Healthy Banana Ice Cream Recipe (3-Ingredient Nice Cream)
Creamy, naturally sweet, and made with just three ingredients — no ice cream maker, no dairy, no refined sugar.

Most “healthy” ice cream recipes either need an ice cream maker or end up icy and hard instead of creamy. The texture problem almost always comes down to one thing: not enough ripeness or freezing time on the bananas before they’re blended.
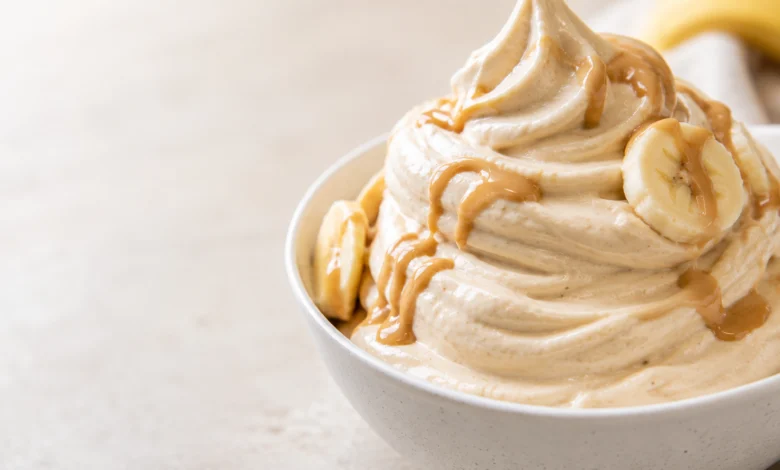
This version solves that with properly frozen, very ripe bananas blended into a soft-serve consistency that genuinely tastes like ice cream, not a fruit smoothie. It’s naturally sweetened by the bananas themselves, comes together in one step, and takes about 5 minutes of active time.
Quick Answer
Healthy banana ice cream, often called “nice cream,” is made by blending frozen ripe bananas until smooth and creamy, similar in texture to soft-serve ice cream. No cream, sugar, or ice cream maker is needed—the natural starches and sugars in ripe frozen bananas create the creamy texture on their own.
Difficulty Level
Beginner. There’s no cooking involved and no special equipment beyond a food processor or high-powered blender. The only skill required is knowing when the bananas are ripe enough and blending long enough to get past the crumbly stage.
Recipe Highlights
- Just 3 base ingredients, no added sugar needed
- Dairy-free and vegan as written
- Ready in 5 minutes of active blending time
- Naturally creamy texture from frozen ripe bananas alone
- Endlessly customizable with mix-ins and flavors
Ingredient Notes
Bananas: Ripeness matters more than almost anything else in this recipe. Bananas with brown speckles on the peel are sweeter and blend much smoother than bananas that are still mostly yellow or green-tinged.
Milk or nut milk: A small splash helps the blades catch and move the frozen banana pieces, especially early in blending. Too much turns the texture into more of a smoothie than a soft-serve consistency.
Vanilla extract: Rounds out the flavor and makes the banana taste more like a dessert. Optional, but recommended.
Mix-ins: Cocoa powder, nut butter, or fresh fruit can all be blended in or folded in at the end—see the Variations section for specific ratios.
Ingredients

Base
- 4 large ripe bananas, sliced and frozen
- 2–3 tablespoons milk or unsweetened nut milk
- 1/2 teaspoon vanilla extract
Optional Mix-Ins
- 2 tablespoons natural peanut butter
- 2 tablespoons unsweetened cocoa powder
- 1/3 cup fresh berries
Step-by-Step Instructions
Step 1 — Freeze the Bananas Properly
Peel and slice ripe bananas into 1/2-inch rounds, then spread them in a single layer on a parchment-lined baking sheet. Freeze for at least 4 hours, ideally overnight. Freezing them in a single layer first, rather than dumping slices straight into a bag, keeps them from clumping into one solid frozen mass.
The first time I skipped the single-layer freeze and just tossed banana chunks in a bag, they froze into one giant block that was nearly impossible to blend evenly.
Step 2 — Start Blending
Add the frozen banana slices to a food processor along with 2 tablespoons of milk and the vanilla extract. Blend, stopping to scrape down the sides every 30–60 seconds. The mixture will go through a crumbly, sand-like stage first — this is normal and expected.
Step 3 — Blend to Soft-Serve Texture
Keep blending, scraping the sides as needed, for a total of about 3–5 minutes. The mixture will shift from crumbly to a thick paste and finally to a smooth, creamy, soft-serve texture. If it’s not moving at all, add the remaining tablespoon of milk, one teaspoon at a time.
This step always takes longer than people expect on the first try — don’t add extra liquid too early just because it looks stuck. Give the blades time to work through the crumbly stage first.
Step 4 — Add Mix-Ins (Optional)
If using mix-ins like peanut butter or cocoa powder, add them once the base has reached a smooth, creamy consistency and pulse briefly to combine. For fresh berries, fold them in by hand at the end to keep some texture, rather than blending them fully in.
Step 5 — Serve or Re-Freeze
The banana ice cream is ready to eat immediately at a soft-serve consistency. For a firmer, scoopable texture, transfer it to a freezer-safe container and freeze for 1–2 hours before serving.
Expert Tips
- Use very ripe, spotty bananas. Underripe bananas blend up starchy and less sweet.
- Freeze bananas in a single layer first. This is the single biggest factor in how easily they blend.
- A food processor works better than a standard blender for this texture, since it doesn’t rely on a vortex to move thick, frozen pieces.
- Don’t over-add liquid. A little goes a long way — too much turns this into a smoothie instead of soft-serve.
Common Mistakes
Mistake 1 — Icy, Grainy Texture Instead of Creamy
Cause: Under-ripe bananas, or bananas that were frozen in a clumped mass rather than a single layer.
Fix: Use bananas with brown speckles on the peel, and freeze slices in a single layer before transferring them to a bag or container.
Mistake 2 — Mixture Won’t Blend, Stays Crumbly
Cause: Not enough liquid, or stopping the blending too early.
Fix: Keep blending and scraping the sides — most blends pass through a crumbly stage before turning smooth. Add liquid only a teaspoon at a time if it’s truly stuck.
Mistake 3 — Ice Cream Melts Too Fast Once Served
Cause: Blending in too much liquid or serving straight from the food processor without any additional freeze time.
Fix: Keep added liquid minimal, and for a firmer scoop, transfer to the freezer for an hour or two before serving.
FAQ
Can I make this without a food processor?
A high-powered blender with a tamper works, but it’s more difficult since the blades rely on a vortex that thick frozen fruit doesn’t create easily. A food processor is strongly recommended for the smoothest result.
Can I make this ahead of time?
Yes. Once blended, store it in an airtight, freezer-safe container. It’s softest within the first hour and firms up to a more scoopable texture after a few hours in the freezer.
Does it taste like real ice cream?
The texture is very close to soft-serve, and the flavor is naturally sweet and banana-forward. It’s not identical to dairy ice cream, but it satisfies the same craving without added sugar or cream.
Why did my nice cream turn brown?
This is natural oxidation from the bananas and doesn’t affect the flavor or safety. A small splash of lemon juice added before freezing can help slow the browning if it bothers you visually.
Storage and Reheating
Room Temperature
Let it sit at room temperature for 5–10 minutes before scooping if it’s been frozen solid to soften slightly.
Refrigerator
Not recommended for storage; this needs to stay frozen to hold its texture.
Freezer
Store in an airtight container for up to 1 month. Texture is best within the first week, as ice crystals form gradually over time.
Reheating
Not applicable — this is a frozen dessert. Simply let it soften at room temperature before scooping if needed.
Variations
Chocolate Peanut Butter Nice Cream
Blend in 2 tablespoons cocoa powder and 2 tablespoons natural peanut butter for a rich chocolate-peanut butter version.
Strawberry Banana Nice Cream
Blend in 1 cup frozen strawberries along with the bananas for a fruity, naturally pink version.
Mint Chip Nice Cream
Add 1/4 teaspoon peppermint extract and fold in mini dark chocolate chips after blending.
Nutrition
Estimated per serving, based on 4 servings:
- Calories: 105
- Protein: 1g
- Carbohydrates: 27g
- Fat: 0g
- Sodium: 2mg
After testing multiple ingredient combinations and baking methods, this version consistently delivered the crispiest base and best texture. The simple pre-bake step made the biggest difference in every batch.