
Chicken Teriyaki Bento Box Recipe (Easy Meal Prep)
Sticky glazed chicken, rice, and crisp vegetables packed into one balanced lunch box.

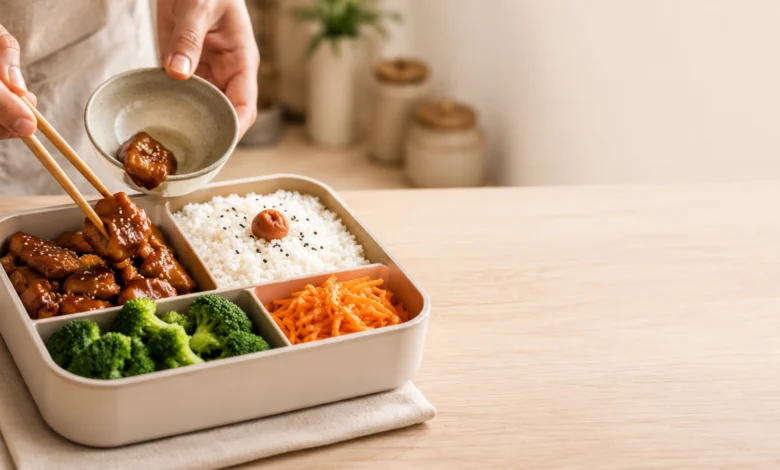
Most lunches you throw together in the morning end up unbalanced — all carbs, no protein, or a sad pile of vegetables with nothing to make them interesting. A proper bento box fixes that by design: one compartment for protein, one for rice, one for vegetables, all portioned out so you’re not guessing.
This chicken teriyaki version is the one I come back to most because the components hold up well cold or reheated, which is really the whole test for a make-ahead lunch. The chicken stays juicy under the glaze, the rice doesn’t dry out, and the vegetables keep their crunch instead of turning limp in the fridge overnight.
Quick Answer
Cook diced chicken thighs in a homemade teriyaki glaze until sticky and caramelized, then divide it into a bento box alongside steamed rice and quick-blanched or raw vegetables. The whole thing comes together in under 40 minutes and keeps well in the fridge for 3–4 days, making it ideal for meal prep.
Difficulty Level
Beginner. The teriyaki sauce comes together from pantry staples, and the assembly is really just portioning — no special bento skills required.
Recipe Highlights
- Ready in under 40 minutes, start to finish
- Meal-preps for 3–4 days in the fridge
- Balanced macros in one container — protein, carbs, vegetables
- Works cold or reheated
- Easily doubled for a full week of lunches
Why This Recipe Works
Chicken thighs hold up better than chicken breast in a bento box because they have more fat marbled through the meat, which keeps them from drying out once refrigerated and reheated. Breast meat tends to turn rubbery under those conditions; thighs stay tender.
The teriyaki glaze itself relies on a simple ratio — soy sauce, mirin, sugar, and a little cornstarch to thicken it into something that clings to the chicken instead of pooling in the pan. That thickened glaze is what gives you the sticky, lacquered coating rather than a thin, watery sauce.
The 3-Step Plan
Step 1: Cook the chicken
Sear diced chicken thighs, then simmer in the teriyaki sauce until glazed and sticky.
Step 2: Cook the rice
Steam or cook rice while the chicken simmers so everything finishes around the same time.
Step 3: Assemble
Divide chicken, rice, and vegetables into your bento box compartments.
Ingredient Notes
Chicken thighs, boneless and skinless, are worth seeking out over breast meat here. They’re more forgiving if slightly overcooked and stay moist through a day or two of refrigeration.
Mirin is a sweet Japanese rice wine that gives teriyaki sauce its characteristic gloss and subtle sweetness. If you can’t find it, substitute 1 tablespoon of dry sherry or rice vinegar mixed with an extra teaspoon of sugar — it won’t be identical, but it gets close.
Low-sodium soy sauce is worth using since the sauce reduces down and concentrates in flavor. Regular soy sauce can push the final glaze into overly salty territory.
Cornstarch thickens the sauce so it clings to the chicken rather than running off. Skip it and you’ll end up with a thin, watery glaze instead of that classic sticky coating.
Short-grain or medium-grain rice holds together better in a bento box than long-grain rice, which tends to fall apart and dry out when packed and chilled.
Ingredients

Chicken and Sauce
- 1.5 lbs boneless, skinless chicken thighs, diced
- ¼ cup low-sodium soy sauce
- 3 tablespoons mirin
- 2 tablespoons brown sugar
- 1 tablespoon rice vinegar
- 1 teaspoon grated ginger
- 1 garlic clove, minced
- 1 teaspoon cornstarch mixed with 1 tablespoon water
- 1 tablespoon neutral oil, for searing
Rice and Vegetables
- 2 cups cooked short-grain rice
- 1 cup steamed broccoli florets
- 1 cup shredded carrots
- 1 teaspoon sesame seeds, for garnish
Step-by-Step Instructions
Step 1 — Sear the chicken
Heat the oil in a skillet over medium-high heat. Add the diced chicken thighs in a single layer and sear for 3–4 minutes per side, until golden brown on the outside. The chicken doesn’t need to be fully cooked through yet — it’ll finish in the sauce.
Step 2 — Build the sauce
In a small bowl, whisk together the soy sauce, mirin, brown sugar, rice vinegar, ginger, and garlic. Pour this over the seared chicken in the skillet and bring it to a simmer.
Step 3 — Reduce and glaze
Simmer the chicken in the sauce for 5–6 minutes, stirring occasionally, until the internal temperature reaches 165°F. Stir in the cornstarch slurry and cook for another minute, until the sauce thickens and coats the chicken in a glossy, sticky layer.
Step 4 — Cook the rice
While the chicken simmers, cook the rice according to package instructions if it isn’t already prepared. Fluff it with a fork once done so it doesn’t clump when packed.
Step 5 — Assemble the bento box
Divide the rice, glazed chicken, broccoli, and shredded carrots into separate compartments of your bento box. Sprinkle sesame seeds over the chicken. Let everything cool to room temperature before sealing the lid if you’re storing it for later — sealing it hot will trap steam and make the rice soggy.
Expert Tips
- Dice the chicken evenly so every piece cooks at the same rate — uneven pieces mean some are dry while others are underdone.
- Don’t skip the cooling step before sealing. Packing hot food traps condensation, which softens the rice and can make vegetables soggy by the next day.
- Keep sauces and dressings separate if you’re adding anything beyond the teriyaki glaze — a small sauce container keeps other components from getting soggy.
- Steam vegetables just until bright and tender-crisp. Overcooked vegetables turn mushy and lose their color after a day in the fridge.
Common Mistakes
Mistake 1 — Watery, thin sauce
Cause: Skipping the cornstarch slurry or adding it before the sauce has come to a simmer.
Fix: Whisk the cornstarch slurry in only after the sauce is simmering, then let it bubble for a minute to activate the thickening.
Mistake 2 — Dry, tough chicken
Cause: Using chicken breast instead of thighs, or overcooking the chicken during the searing step.
Fix: Stick with thighs, and remember the chicken finishes cooking in the sauce — don’t fully cook it through during the initial sear.
Mistake 3 — Soggy rice after a day in the fridge
Cause: Sealing the bento box while the food is still hot, which traps steam inside the container.
Fix: Let all components cool to room temperature before sealing the lid.
FAQ
Can I freeze a chicken teriyaki bento box?
The chicken freezes well on its own for up to 2 months, but the rice and vegetables are best made fresh or refrigerated rather than frozen, since both lose texture after thawing.
Can I make this ahead for the week?
Yes — this is a solid meal-prep recipe. Cook a larger batch of chicken and rice, then portion into containers for up to 4 days in the fridge.
Why did my chicken turn out dry?
This usually comes down to using chicken breast instead of thighs, or overcooking during the sear before it goes into the sauce.
Can I eat this cold?
Yes, it’s designed to work cold straight from the fridge, though a quick reheat brings back some of the glaze’s stickiness.
Storage and Reheating
Room Temperature
Bento boxes are fine at room temperature for up to 2 hours — beyond that, refrigerate.
Refrigerator
Store sealed in the fridge for 3–4 days.
Freezer
Freeze the cooked chicken separately for up to 2 months; thaw overnight in the fridge before using.
Reheating
Microwave for 1–2 minutes, or until warmed through. Add a splash of water to the rice before reheating to help it steam back to soft.
Variations
Salmon Teriyaki Bento
Swap the chicken thighs for cubed salmon, adjusting the simmer time down since salmon cooks faster.
Vegetarian Teriyaki Bento
Replace the chicken with cubed extra-firm tofu, pressed and pan-fried before adding to the sauce.
Low-Carb Bento
Swap the rice for cauliflower rice or a bed of extra steamed vegetables.
Nutrition
- Calories: 410 per serving
- Protein: 32g
- Carbohydrates: 38g
- Fat: 14g
- Sodium: 780mg


